At A Glance Main Projects Tutorials Resume

Contact


Email: palen1c at gmail.com


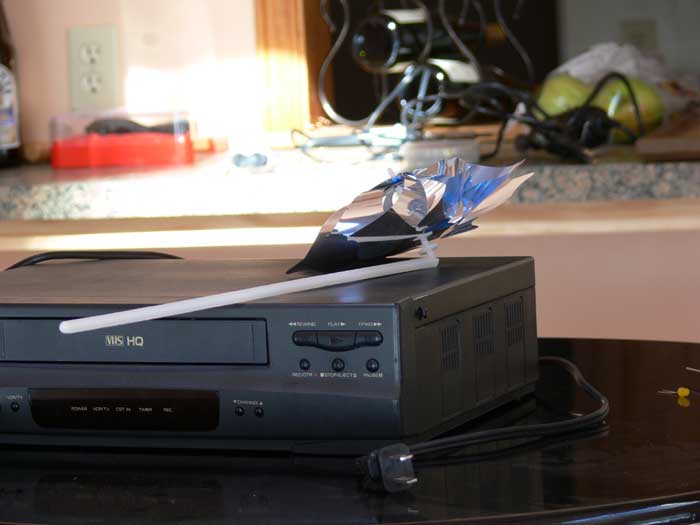
How to Make a Wind Powered LED From a VCR


With the end of the high definition video disk wars coming to a close with Sony's Blue Ray the definitive victor; what will happen to our beloved players of times past? Standard definition DVD players still have a lot of life left in them, but the now archaic magnetic tape VHS format is pretty much gone for good. Is there any use for old school VHS players besides being another piece of scrap plastic to toss in the dumpster? The great thing about a VCR (videocassette recorder, video recorder) is that it has so many mechanical parts. No wonder why every one of these contraptions eventually succumbs to unpleasant tape eating.
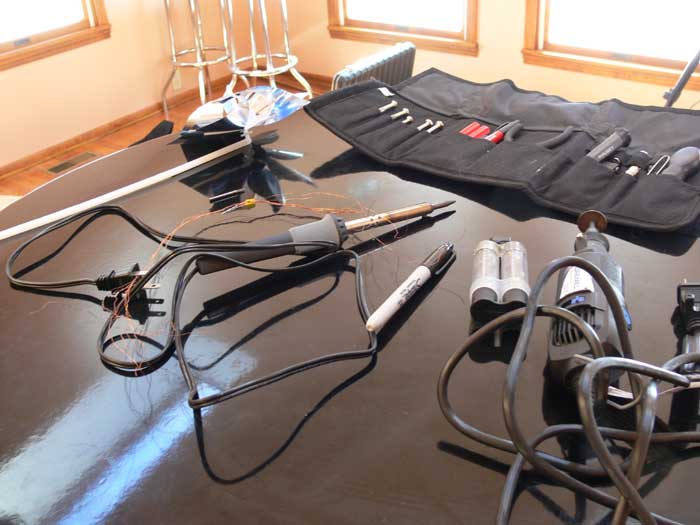
An average tape eating VCR and blue pinwheel The finished LED pinwheel half lit up and half in light.  My sister Morgan helped with this picture The LED pinwheels in the dark

I will do my best to first list the tools needed for this project, then I will describe each step below. Hold on to your chairs, because it's going to be a wild ride!

Tool List

Many of the tools that are used in this project
1. Pinwheel
2. Six strands of copper wire
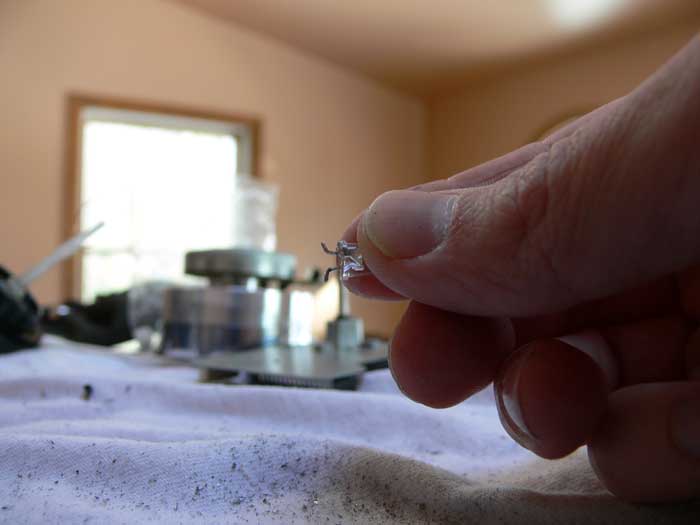
3. An LED
4. Soldering iron and solder
5. Quick set epoxy
6. Scissors or a knife
7. Wire Cutters
8. Some sort of file
9. Screw driver
10. Drill with small bits
11. Clamps for securing items while drilling
12. Permanent marker
13. Old VCR (I have used a CD-Rom drive too) that you can extract motors, gears, and metal pieces from

Step 1 - Take Everything Apart

The underside of the VCR with the housing removed
The first thing you need to do is take apart every possible piece of the bland looking player. When you remove the outside casing you will rapidly discover that the rectangular plastic slab houses a trove of mechanical complexity. The primary objective of your prod into the unknown is the small electrical motors. I found three motors in my excursion. Two of them were too large to use, and fortunately the motor that drives the loading mechanism of the tape player was just right.

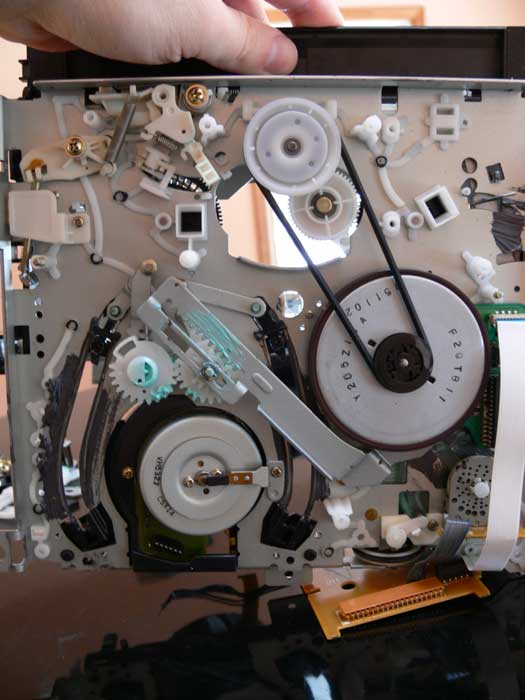
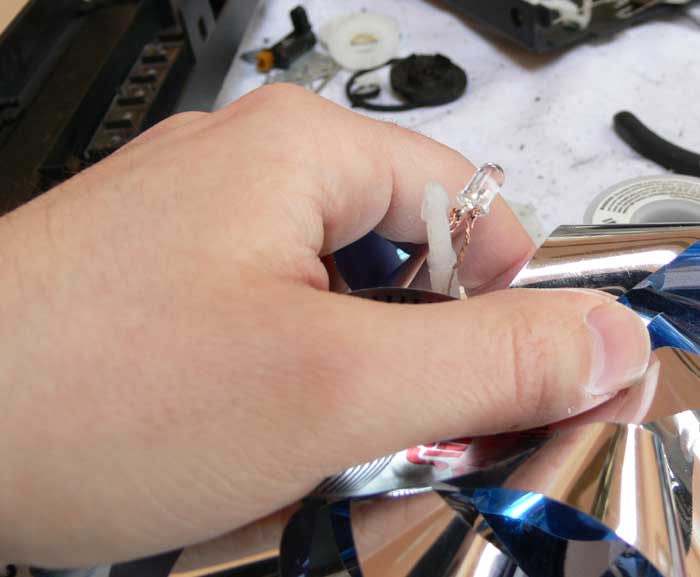
After you find a motor that you think will do, take the terminals of your LED and connect or hold them on the positive and negative terminal of the engine. Quickly spin the motors' shaft using your fingers. If the LED doesn't light up, try spinning the motor in the opposite direction. If that doesn't work, try the same thing on the other motors. Hopefully you will find one that can light the LED.

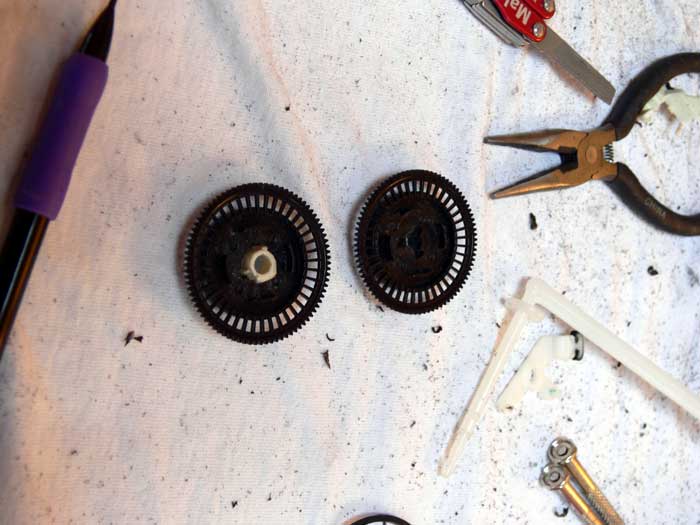
Step 2 - Pick Gears That Will be Used for the Motor and Pinwheel

All of the spur gears found in the vcr with ratios
The second most important pieces that need to be salvaged are any gears that you come across. I prefer to use spur gears, but if you are inclined to use others, then feel free.

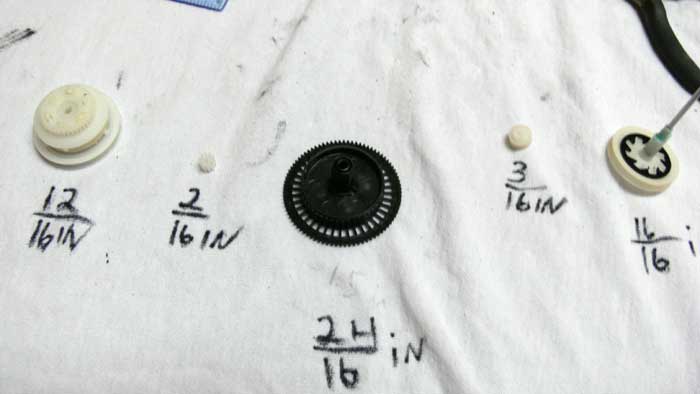
After you have all of the gears, you need to select one for the motor and another for the pinwheel. The pinwheel gear should be relatively large in comparison to the motor gear, but not too large. You need to determine a ratio in the gears diameters that allow the pinwheel to spin freely, but also will spin the motor rapidly enough to light the LED. You may have to use trial and error once you get the entire contraption put together.

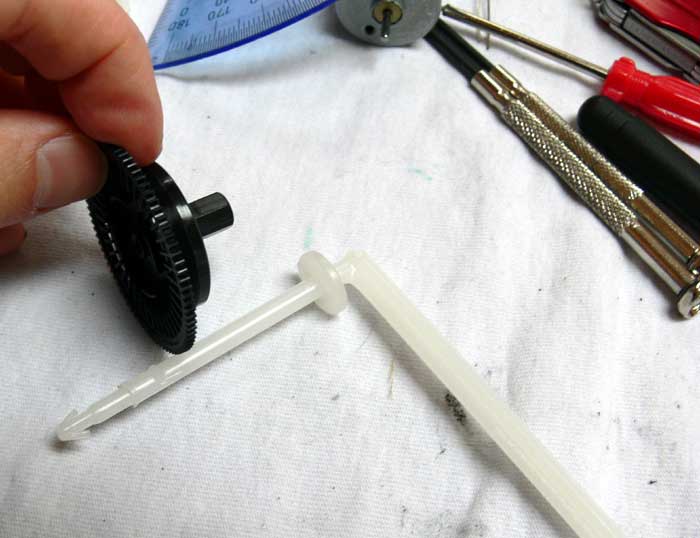
Step 3 - Modify the Large Gear so it Fits on the Shaft

The play head gear with too small of a hole to fit on the pinwheel shaft
Cutting the pinwheel gear with a jack knife
Two play head gears with one having a modified center with an additional piece of cylindrical plastic
It is imperative that the large pinwheel gear spin freely and precisely. I had to drill a hole in the VCR play head gear I selected so that it would fit over the shaft of the pinwheel. After testing the gear, it was wobbling back and forth as it was spinning. In order to remedy this, I extracted another plastic cylindrical part from the VCR which fit firmly inside of the play head gear and on the shaft of the pinwheel. This reduced the wobbling of the large gear immensely. After I was certain that the addition of the new piece was a good idea, I reinforced it with epoxy.

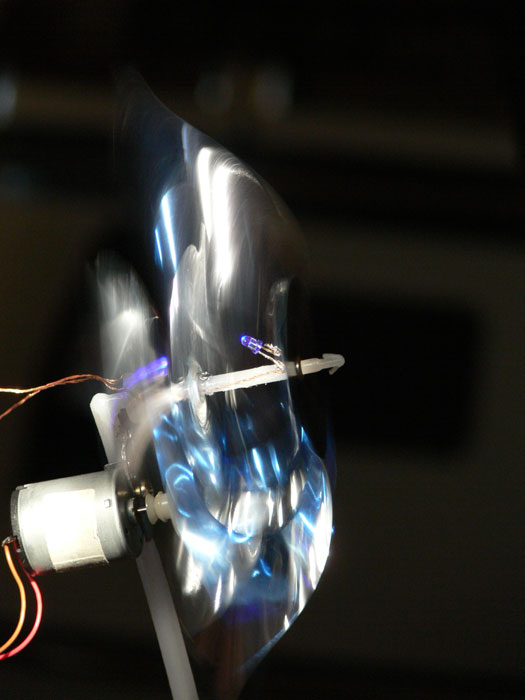
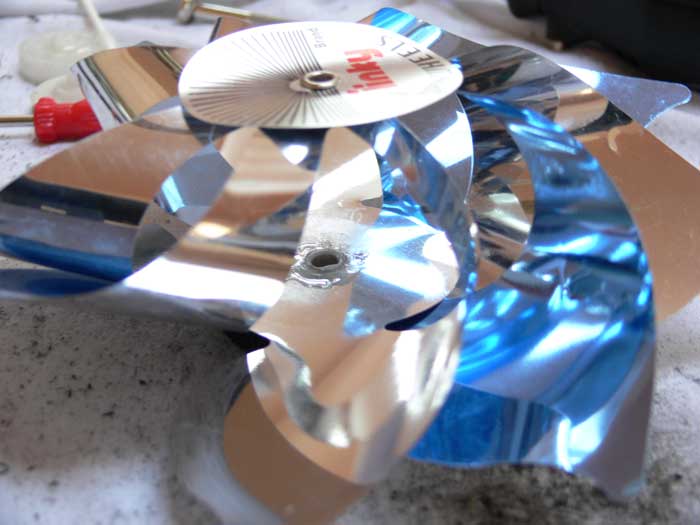
Step 4 - Melt the Copper Wire Into the Pinwheel

Shaft of the pinwheel with twisted copper wires melted in
You will now be melting wire for the motors positive and negative terminals into the shaft of the pinwheel. Take some thin copper wire strands and spin them together. I used three small strands that I had laying around and cut the final strand in half for the positive and negative terminals.

After you have the wire twisted into two larger strands, take your soldering iron and press the wire into the plastic of the shaft where the fan spins. Make sure to reference the video and pictures for the proper place to do this. Do your best to try and melt the plastic in a uniform way so that the surface remains as smooth as possible. The fan will still have to spin over top of the spot that we are melting the wire into.

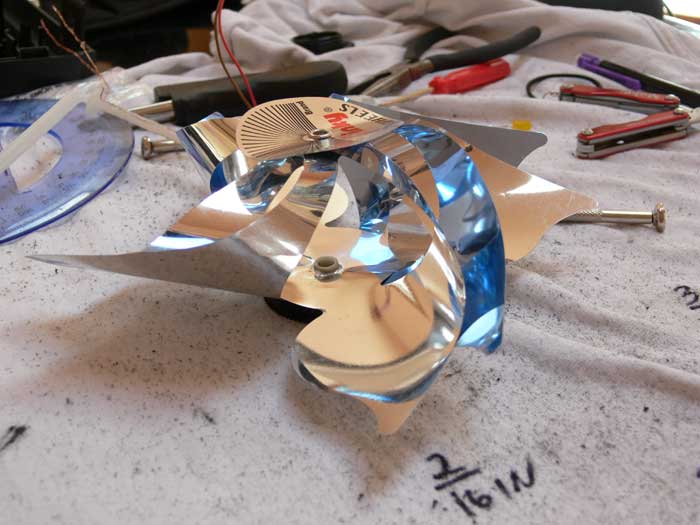
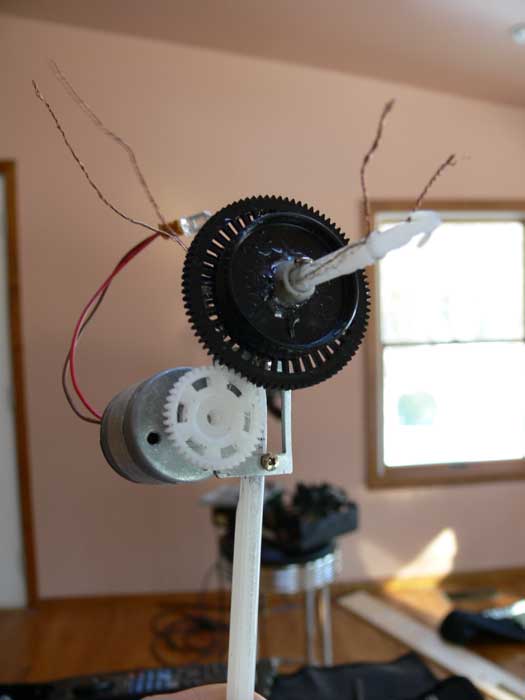
Step 5 - Glue the Large Gear to the Fan of the Pinwheel

Pinwheel fan turned fan side up with platic piece of vcr inside inner hole
Back side of the pinwheel fan with large gear attached
Now determine the best way to mount your main gear onto the pinwheel fan. I was lucky because the hole in the main gear was only slightly larger then the fan. I forced the fan over top of the main gear and it stayed in position long enough for testing. I reinforced the seal using epoxy toward the end of the project after I knew that I had the correct configuration.

Step 6 - Select a Motor Mount Bracket

The engine and bracket mounted to the shaft of the pinwheel with screws
Look through all of the spare parts from the VCR and pick out pieces that you think could be used to mount the motor to the pinwheel shaft. I found about three possible candidates, but settled for a slightly bent small piece of metal that I could easily screw the motor into. Normally, a small electric motor will contain pre-drilled screw holes. You can use these in order to help mount the motor. I chose the piece of metal because when I compared it to the other possibilities, it seemed to have the most durability. The other great thing about using a piece of metal for the motor mount is that you can bend it in order to make small adjustments when trying to mesh the gear train.

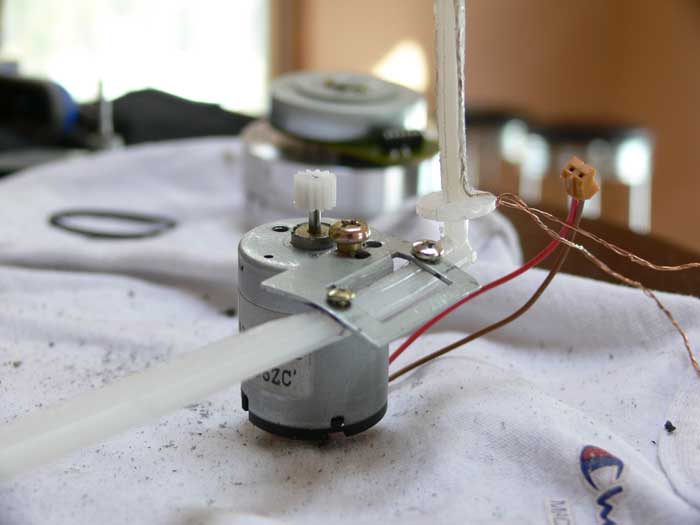
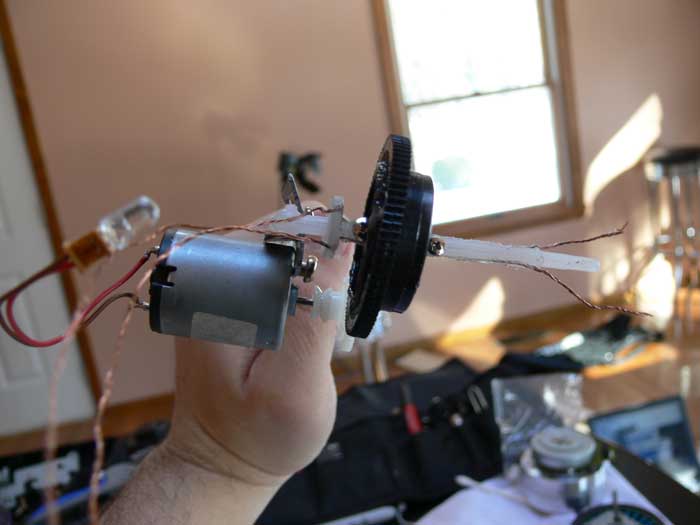
Step 7 - Attach the Motor and Mounting Bracket to the Shaft of the Pinwheel

Holding all of the gears and mount in place on the shaft for a visual position estimation
You will have to hold the motor onto the pinwheel shaft and guess where the best place to put the mount will be.

In both instances that I have made an LED pinwheel; I used a file or dremel to flatten the side of the pinwheel shaft that I mounted the motor to. Flattening the shaft ensures a tighter mount and makes it easier to drill holes through the plastic for fastening screws.

Next, hold all of the pieces where you think they will be mounted and use the permanent marker to draw marks on the shaft of the pinwheel where you will be placing the mounting screws.

Use a drill with a very small bit to drill holes through the mounting bracket and pinwheel shaft where the motor mount will be placed. You can use some of the screws from the vcr in order to attach the motor mount.

Now, you will have to drill holes in your motor mount in order to attach the motor to it. You should also be able to use some of the screws from the VCR for attaching the motor.

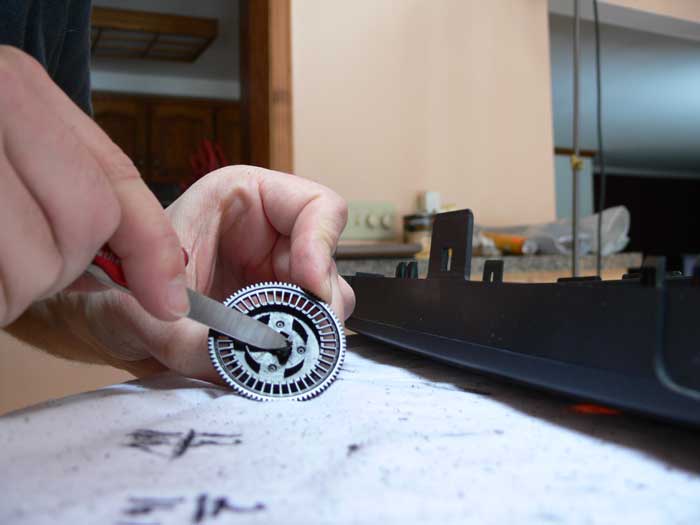
Step 8 - Optimize the Motor Mount

The motor mount, engine, and pinwheel gear on the shaft
The next trick is to get the gear for the fan and the gear on the motor to line up so that their gears mesh. This is probably the most difficult step of the entire process. You may have to drill additional holes in the motor mount, or re-position the motor in order to get an optimal mesh. I had to change the gears I was using at this step because I found that the differences in the gear diameters was too great to allow the pinwheel to still turn freely.


Step 9 - Secure the Fan Gear With Two Screws

Top of the pinwheel shaft with two drill holes marked for screws to hold the pinwheel gear in place
Top of the pinwheel shaft with gear secured by two shiny screws
Once you believe you have the proper mesh, you will want to drill two more holes in the top of the pinwheel shaft by the location where you previously melted wires for the LED. This is in order to make holes for two screws which will be used to hold the main gear attached to the fan in place while the device is in operation. You can determine the best spot to make these holes by holding the fan gear in place and using a permanent marker to create spots on the top of the shaft for drilling.

Step 10 - Fix any Outstanding Problems

Pinwheel fan with a mass of epoxy spread around the center of the plastic cylindrical piece of the main gear
After you have drilled the holes on the top of the shaft, and are confident of the fan and motor gear alignment, utilize the epoxy and permanently attach the fan gear to the fan.
Once the epoxy has set, insert both screws into the top of the shaft in order to secure the fan in position. It is now time to solder the LED to the positive and negative wires.

Step 11 - Solder the LED to the Wire Melted Into the Shaft

LED terminals bent at an angle so it will be easier to hook the wires onto
Harmlessly bending the fan so it is easier to solder the LED
Bend the two wires melted inside the shaft into the shape of two hooks. Also take the positive and negative terminals of the LED and bend those into hooks so that they clasp the hooks of the wires. Wrap the wires continuously around the hooks of the LED until they are wrapped tightly. Then use a soldering iron to place solder over the LED and wire so that it is attached securely.

Step 12 - Lubrication?

WD-40 on the right with sparkling LED pinwheels trailing off to the left
If your LED Pinwheel isn't spinning as freely as you would like it to, don't be afraid to add lubrication to the gears. I have used WD-40 on both of the pinwheels I have made. The first pinwheel has been tested in a major rain storm and it ran the whole time perfectly fine. Don't be afraid to really whip these around. Both of mine have a slightly different gear train configuration, but so far they have both proved to be exceedingly durable and fun.

Comments

Mojo
Mojo
May 5, 2009 6:31 pm

Funny I was thinking of building the same thing and wondering if anyone else made it before I checked out the video and it helped me edit my idea of how to make it

Charles
Charles
March 27, 2008 10:57 pm

Good point whoever posted for "Wondering". You would have to chop the top shaft off of the pinwheel and some how re-mount it to the motor axel. If you didn't have a support shaft that went through the pinwheel I think you would get bad results because the fan is too flimsy to be held in a fan position on its own. Wind from a sideways direction would cause it to bend and not spin properly. Its worth a try!

Wondering
Wondering
March 27, 2008 4:02 pm

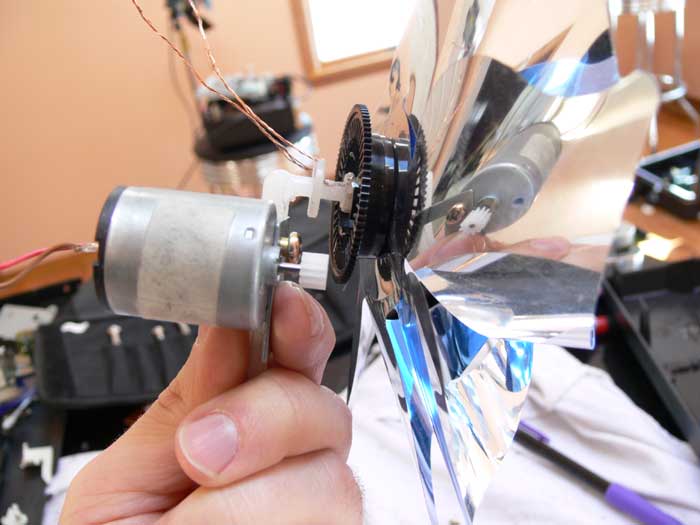
"The next trick is to get the gear for the fan and the gear on the motor to line up so that their gears mesh." Why did you need the gear system at all? Why wouldn't you mount the pinwheel straight to the motor??

rob
rob
March 26, 2008 02:16 am

cool story! it's been added to http://www.gearcult.com

Comments are currently disabled.